
The Earth is not flat and even a desert board should have some changes in elevation.
Our board is set in an area of large rolling hills. So large that individual hills are impractical…here we go with tiles. Now when I say tiles I mean a set of terrain pieces that lay butted up next to each other to form the board’s ground. Sometimes they cover the whole gaming area, sometimes they don’t. There are a lot of people out there who are probably more skilled than me making these and quite a few of those have blogs and videos telling you how to do it. Here are a few links:
1000 Foot General: Making Terrain Boards Part 1: Planning
The Terrain Tutor: Precision Cutting Foam for Terrain Boards
My problem is that I’m always up against a tight deadline…cause the Man-Beast don’t focus on a project till forced no matter how many times I warn him time is getting short. That means I stick to techniques I know will work and only innovate a bit here and there. I also take risks with drying and wrap that I would prefer not to but can’t help.
I use what I’ve got to make what I need and get it out the door on time.
So here we go. I will be making six 16” x 24” tiles that will sit together to make a 48” x 48” area. I will use ¼” Masonite for the bottom of the tiles and gluing 2” foam board on top to sculpt. I don’t have a table saw so to save myself a lot of trouble getting the Masonite uniform and square I go to the big box tool store and have them cut the Masonite I buy from them. And that’s the first problem I run into.
They are only stocking Masonite in precut sheets around 2” x 4” that aren’t truly square and then the guy working the department isn’t that good at using their cutting machine. In the end I cut my losses and settle for 6 Masonite boards that are not identical but do butt-up together without gaps. Ugh! That means I have to keep track of which board goes where from the very beginning. Get them in the wrong order and they wont line up.
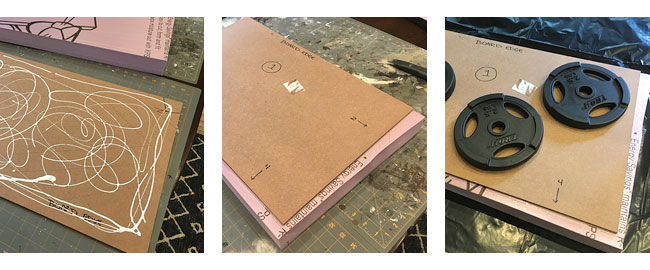
This also means that the usual trick of using 2 Masonite boards to trim the foam to size before gluing wont work. So I have to get clever. I start by labeling the undersides of the Masonite so that I can get it back together in the right order later. Then I score everything and glue the foam to the Masonite with PVA leaving overhang on at least three of four sides. I have experimented with using hot glue to hold the foam to the Masonite while the PVA cures but feel it creates a bit of space between the two that shows at the edges and I have to fill later. As I have time for the glue to cure, I skip the hot glue for a closer fit. The whole pile of tiles will end up siting in a stack with weights on top for a few days while I deal with other things and by the time I have time to deal with it the glue is dry and nothing has warped.
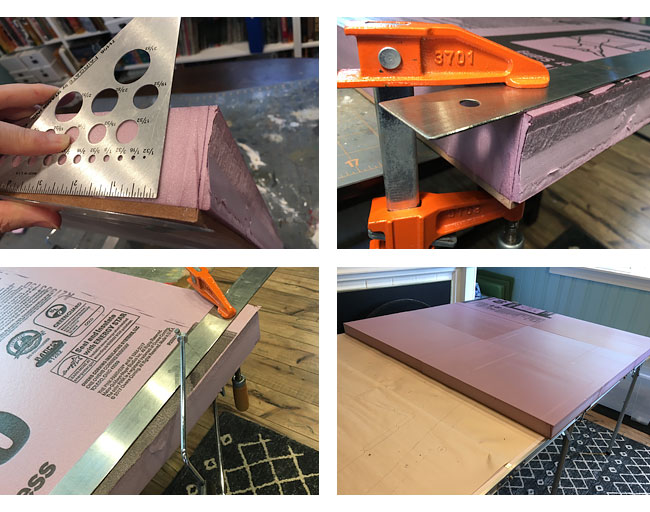
Time to cut. I need two hard surfaces to drag a hot wire along so I can remove the excess foam and have a clean square edge to the tile. The Masonite base is one edge. The other will come from my very old T-square clamped on top of the tile. I start by using an angle to mark the corner and carry a line to the top of the tile. That shows me where to clamp the bar on top. Then I pull a hot wire along the edge. It takes so much longer than it should as I have to mark each corner and move the bar for every cut but there’s nothing for it. Eventually I have 6 tiles ready to be carved.
Now let’s make a pattern cause we need to transfer our design from the Mock Up to the foam. You’ll need tracing paper. If your sheet size is smaller than the thing you’re tracing, tape some sheets together in the same way we did for the Mock Up. Tape the tracing paper lightly to the Mock Up with masking tape and…well, trace. Use pencil. Then label the tracing and cut it out. Then position it on the foam tiles and…well, trace the edges. I used a Sharpie. Save the pattern, especially for roads, because as you cut away foam you might need to retrace the lines.
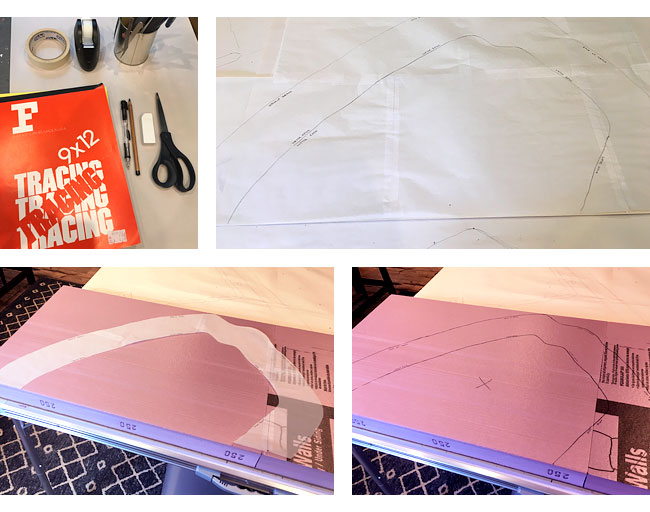
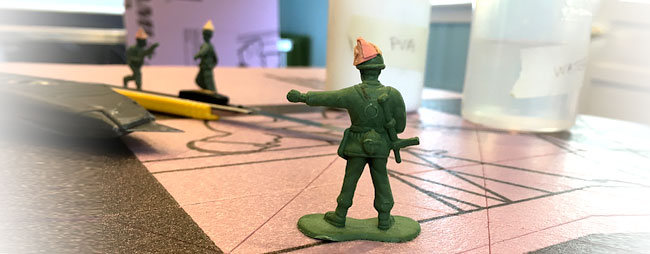
Then I lay out the terrain elements I’ve already made up and add notes for myself about were the highest and lowest points are and the direction of hillcrests. On the sides of the tiles I roughly trace the grades I’m working towards.
![]()
I’m ready to make what I call a rough cut. I will begin joyfully hacking away, removing material from the low spots, following the side, grade lines and blending the high points together with smoother and smoother curves. When a piece of ground is a place that would be more eroded and torn up, like the swamp edges, I hack it up a bit more.
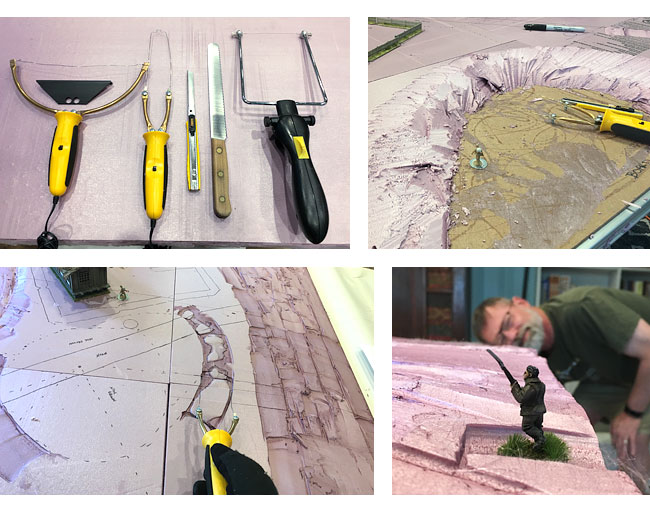
I got the Hot Wire Foam Factory tools I was wanting so badly and they were a big help. In the photo of my tools they are the two on the left. The Shaper on the far left is a replacement for my Woodland Scenics hot wire tool on the far right. I like the new tool but notice that black rhombus of plastic sitting next to it? Without that you can take a bigger bite at a time but the arms pull together turning a slice into a scoop. Do to a shipping mix up I didn’t have that bit of plastic when I needed it. I was slicing off long straight wedges to begin my curves and I hated that tool. I tried wearing a glove and holding the arms out with my fingers but it just didn’t work for me. But later when I was smoothing I liked that scooping behavior as the arms pulled together a bit. If you go for the Shaper, get the Sculpting Tool Wire Tensioner from the Accessories section.
The really exciting new tool is the Router that’s second from the left. This has a heavier wire that you can shape and push into the foam. If you’ve used the Woodland Scenics tool you know that the arms have to clear the material you’re cutting and limit how you can cut = no scooping out material. The Router is not a cheap tool but it saved me a lot of time on this job. And yes that’s a bread knife in the picture and I still use it and it’s still pretty effective.
While I’m doing the rough cut Ed can playtest on the tiles. Between Playtest 1 and 2 I got the rough cut done and being able to see the changes in elevation verses just imagining them completely changed the game results. I think he’s basically thrown Playtest 1 out of the data set. After Playtest 2 we checked lines of sight and made adjustments. The Router was very handy for this too. I could nip out a little hole and sit a figure in it. Once we got to the depth that produced the line of sight we were after, I graded the hill down to that level.
Once we’re happy with the general highs and lows I start smoothing the bits inbetween. This isn’t actually as hard as it sounds but it’s messy.
So before I start smoothing it looks like this.
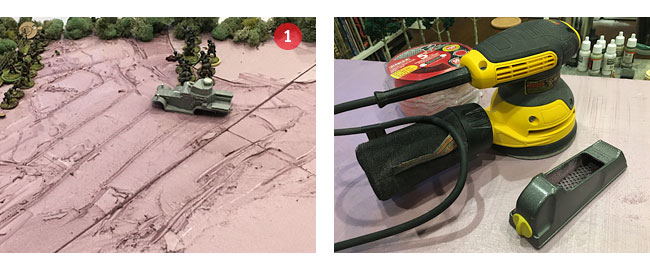
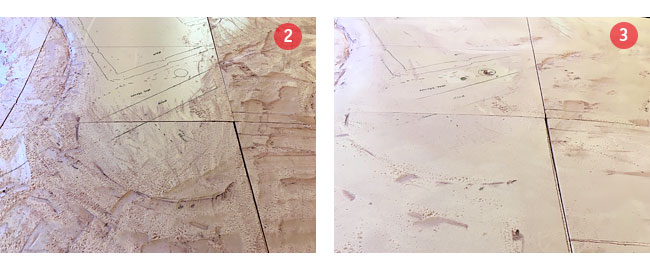
The first thing I do is give the whole thing a few passes with my Pocket Plane, that’s the little tool on the right. It basically has a cheese grater on the bottom and takes down the sharp edges but leaves a rough surface behind. Image No 2 is where I am after the plane. Rough? Yes, but this isn’t wood we’re working, this is foam and we can smooth this pretty easily…but outside. Image No 3 is after I’ve taken the tiles outside and taken the orbital sander to them for a few minutes each.
The foam is now ready to be surfaced. That’s when I add a protective skin to the foam, give it some texture, and get it ready to paint and flock. I’m also going to embed magnets in the foam to hold trees and power poles so they’re not tumbling off hills all game.
Let’s pick up there next time.
Very interesting write-up. I’m learning stuff by reading this series – thank you.