
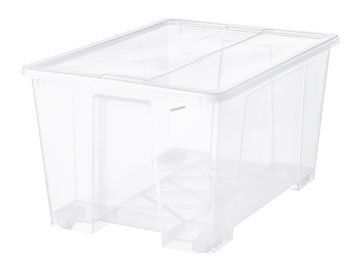
Allow me to introduce you to the Ikea Samla box because moving forward many design decisions for the project will be guided by this box.
If the box is sitting in the middle of the floor we have reached the Production Management phase. I’ll explain.
Production Management is where I decide exactly what I’m building, how I’m building it, how long it will take and how much it will cost…and where the stuff will live when it’s finished. I actually start with that last one…where will it live… in the box.
This is when I tell Ed if what he wants is possible or, more often, I realize just how much of my life this thing is about to take over.
This is the phase that’s the easiest to skip but doing so is…I think, the leading cause of cost overruns and unfinished projects.
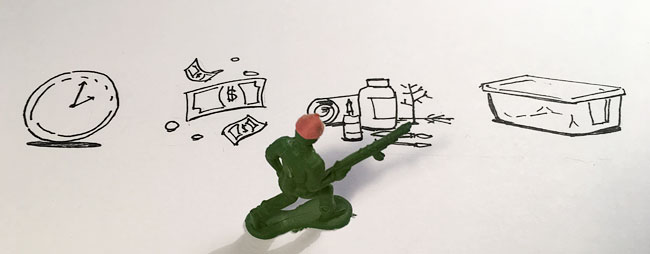
THERE MUST BE ORDER!
And since I have a policy of making Ed pay for his own toys and my labor to produce them I have to put a price on this stuff. No, I am not locked in a tower and making terrain. He pays…oh, he pays.
So I start with the box because it limits the size of what I can build and I want to make any adjustments to the design as soon as possible.
Why the box? Well, back in our tournament-running days we put together tables out of a diverse collection of terrain. Some of the boards were built from large 2’ x 4’ or 3’ x 4’ sections that piled up at a local game store. And then there was the collection of storage boxes…no two alike. At the time Ed was driving a Honda Element but it was still a challenge to pack everything. The first step toward sanity was choosing one brand and size of storage box. Ikea was new in Orlando and they had a large, sturdy, transparent box with wheels on the bottom. That box was part of a series that was modular and stacked beautifully. This became the go to box. Soon after I decided that I was never building anything else for us that didn’t fit in the box…and I haven’t. Before I start any large project I choose either the 30.75” w x 22” l x 7” h or the 30.75” w x 22” l x 17.25” h.
As I said, the thing about the box is that it limits the size of hills and building bases. As soon as I have a layout we like, I start checking it to see if anything will be a problem. Normally I can trim an inch or two and everything’s fine. I double check heights and think about how buildings might come apart.
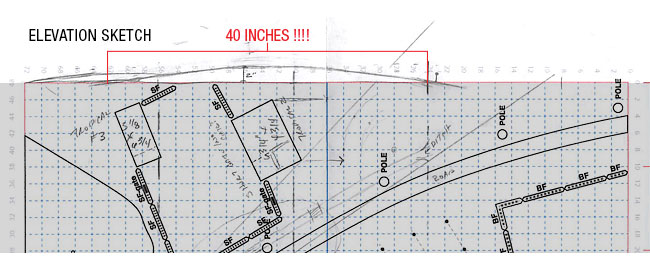
I had intended to build the Malaya project in the same way I did Corinth and the Russian board: a mat with individual hills and other bits sitting on top. (Oh, the mat is rolled and doesn’t have to go in the box.) But as I start thinking about elevations for this project and riding up and down the road in Google StreetView I’m seeing very gradual, very low, very large hills. Damn.
So for the first time in a very long time I think I might be building a set of tiles. I can fit 18” x 24” in the box which is the same size as the newsprint I use to make the Mock Up. Could I make a set of 8 tiles to cover the whole table and stack them in the box?
I will use 2” high foam board and need at least some of the hill crests to be that full 2”. For now it’s best to assume a full 2’ height for all the tiles, so 8 x 2” h = 16” high which will fit in the 17.25 high box but wont leave any space to pack anything else. Doing only 6 tiles will stack to 12” high leaving me 5.25” vertical space for other bits. The buildings I’m using are around 4” tall so that’s promising.
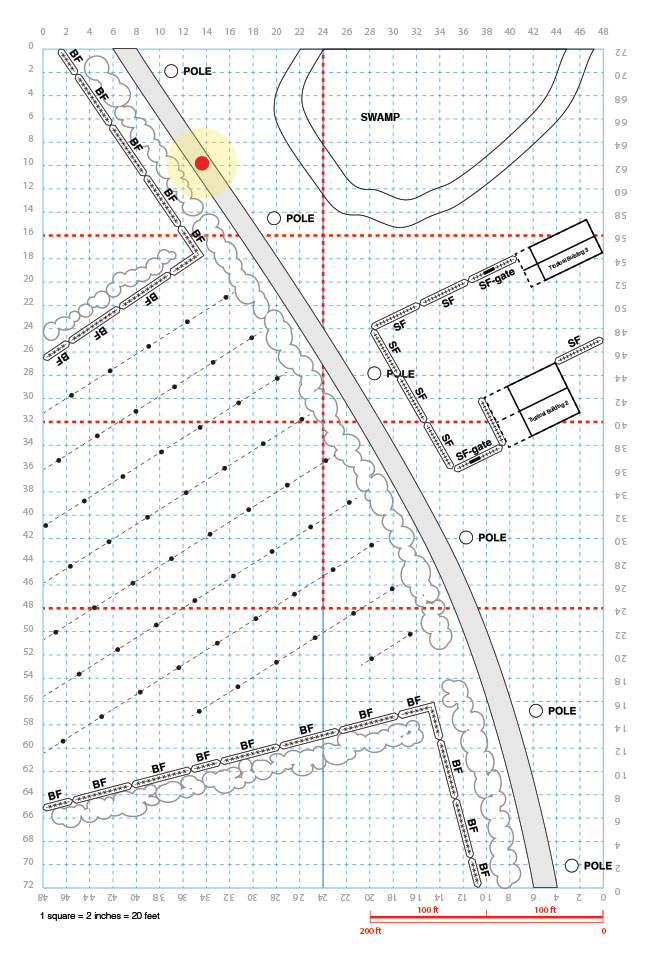
I go back to my plan and decide that the important elevation changes can be represented within the 6 tiles (48” x 54”) and a small mat at one end. But then I look at the box again and I’m a little worried that building tiles to the full 18” x 24” might get a 2” tall section stuck in the bottom of the box because you can’t tip it out. So I decide to play it safe and reduce the max size of the bases to 16” x 24” for a total tile area of 48” x 48”. This will also open up a little more packing space cause…have I mentioned 58 TREES?
So here’s the layout at this point.
So now where am I?
Ground Tiles
I’m producing 6 tiles with long, low hills. This is a difficult thing to achieve with my Woodland Scenics hot wire tool. If I’m going to avoid A LOT of sanding I’m going to need a better tool. A little research leads me to Hot Wire Foam Factory’s router and shaper. Those get added to my wish list and budget.
I need to choose flock. Oh the flock. I know I will spend an afternoon or two looking at pictures and pondering color. I have a standard set of flocks and ground colors for things like fences and tree bases but I do add a unique primary flock blend to big projects to help evoke the particular place. I placeholder the cost with what I spent on the Russian board last year and move on.
Need: A sheet of 2” foam, Masonite, a large tub of spackel, probably 2 spray cans of primer, a plastic drop cloth, a new quart of my standard ground paint color and flock. And tools, I want those new tools.
Requires fabrication. Time estimate: 7 full working days.
Ground Mat
I will still need a mat but it will be small. I have the fabric and will use the same paint and flock as the tiles.
Need: a new quart of my standard ground paint color and flock.
Requires fabrication. Time estimate: 1 Full day.
Trees
…right trees. I’ve already decided to use Woodland Scenics 5”-7” Deciduous Tree Armatures. There are 12 to a pack but I don’t really want the smaller 5 inchers so I hope that they make up 1/3 of the pack and add 8 packs to my list.
I do some searches and spend some time looking at the trees. They are tall, smooth barked and splotchy. That means extra time clipping branches, cleaning off limb stumps and sanding, plus extra paint time. Ugh!!! I will need to start those as soon as possible. And I will need to make a decision about the canopies. I assume I’ll use lichen and leaves but the trees seem so wispy that I’m not sure. I have so much work to do on the trunks I have some time and can placeholder the materials with the cost of lichen and leaves. I have an unopened box of 100 washers so we’re set there. Looking at the hills these trees will be sitting and thinking about the time it will take t set them all up in rows, I think I might have to embed magnets in the hills to grab on the tree bases. Click, click, click and set ups done.
Need: Armatures and canopy material, and Zap. Magnets!
Requires fabrication. Time estimate: HOURS and HOURS! Probably upwards of 40 working hours.
Power Poles
I already have a Rubicon Utility & Light Pole Set with the poles I need. Those came home with Ed from a $10 gift certificate we won for the Russian Board at Cold Wars. Nice when terrain funds terrain.
Need: Nada Requires fabrication. Time estimate: 5 hours
Buildings
Buildings are done.
Fences
Fences are done.
Bushes
I have plenty of lichen for bushes, so done.
Road Block
I don’t think we have time to source and make up a burnt-out truck so I’m planning on a few downed trees. Add that to the tree work. Double-Ugh!
Garden and Animals
If I get time I will make a garden patch from scraps and finish up some chickens and pigs from a box of Warlord Farm Aminals we have on hand.
Storage
1 Large Samla BOX…but because of all the trees, I’m not 100% sure this will pack for transport in one box…actually, I’m 100% sure it wont. UGH!